DIY Arduino Tachometer for your RC Airplane
The Project
To properly tune a small gas airplane engine, a tach is essential. I was just going to buy a tower hobbies tachometer for tuning my new Yak 54 gas RC airplane, but instead I spent an entire day build my own, and you can too!
There are some good products out there that work, but you don't have the sastifaction of making it yourself.
https://www.towerhobbies.com/product/on-board-digital-tachometer/DLEG5525.html
https://www.amazon.com/gp/product/B07N77H8D4/ref=ox_sc_act_title_1?smid=A21F9KBNUKR8LM&psc=1
This will show you how to build your own with hopefully a lot less time than it took me. Also, once you get a ground unit working well, you can add an airplane unit and get RPM telemetry when you are flying, but we will leave that for another day.
The ardupilot documentation has a nice overview of what the software is doing, but we are using an IR sensor instead of a hall effect sensor which requires a magnet, but has less noise.
I roughly followed this tutorial to create mine
The library for the OLED is here
The sensor is not perfect and has about 500-1000 RPMs of noise, which isn't great but not sure how you make it better. One thing I noticed is that if you point the IR transmitter and reciever in a little there seems to be less noise.
Materials
-
ardunio pro mini 5v
-
IR obstacle sensor HW-201 module
-
SSD1306 oled screen
9v battery
Images
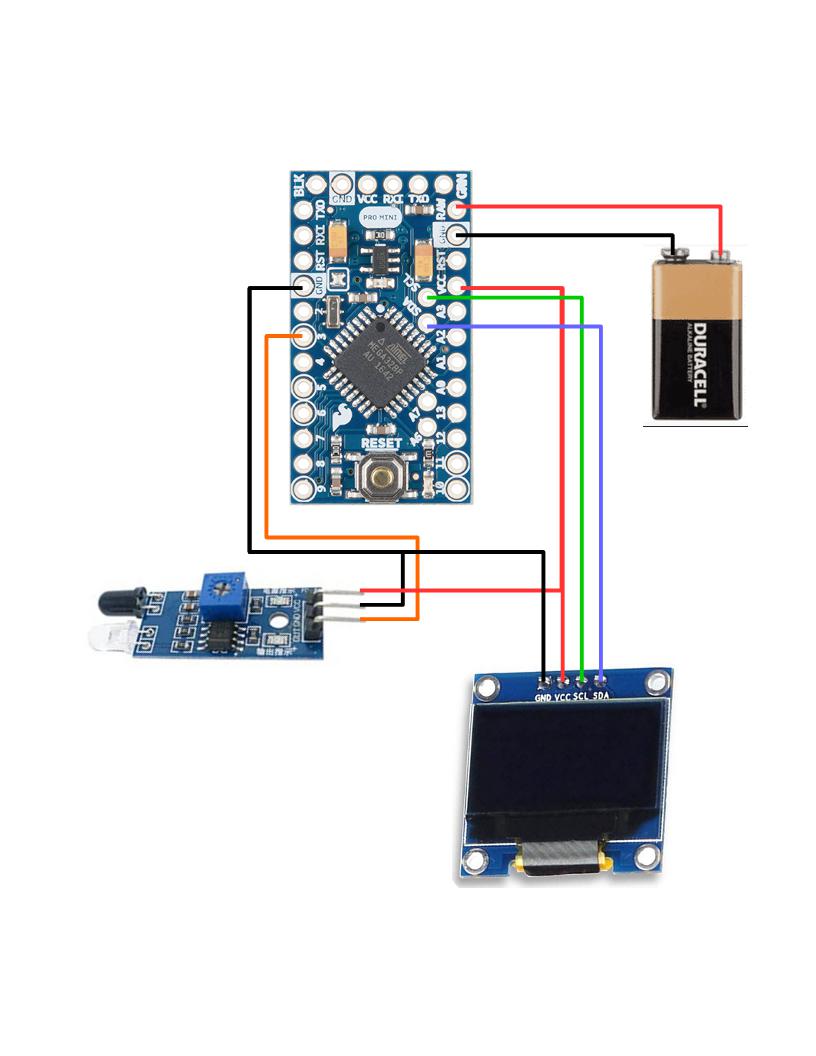
Wiring Diagram
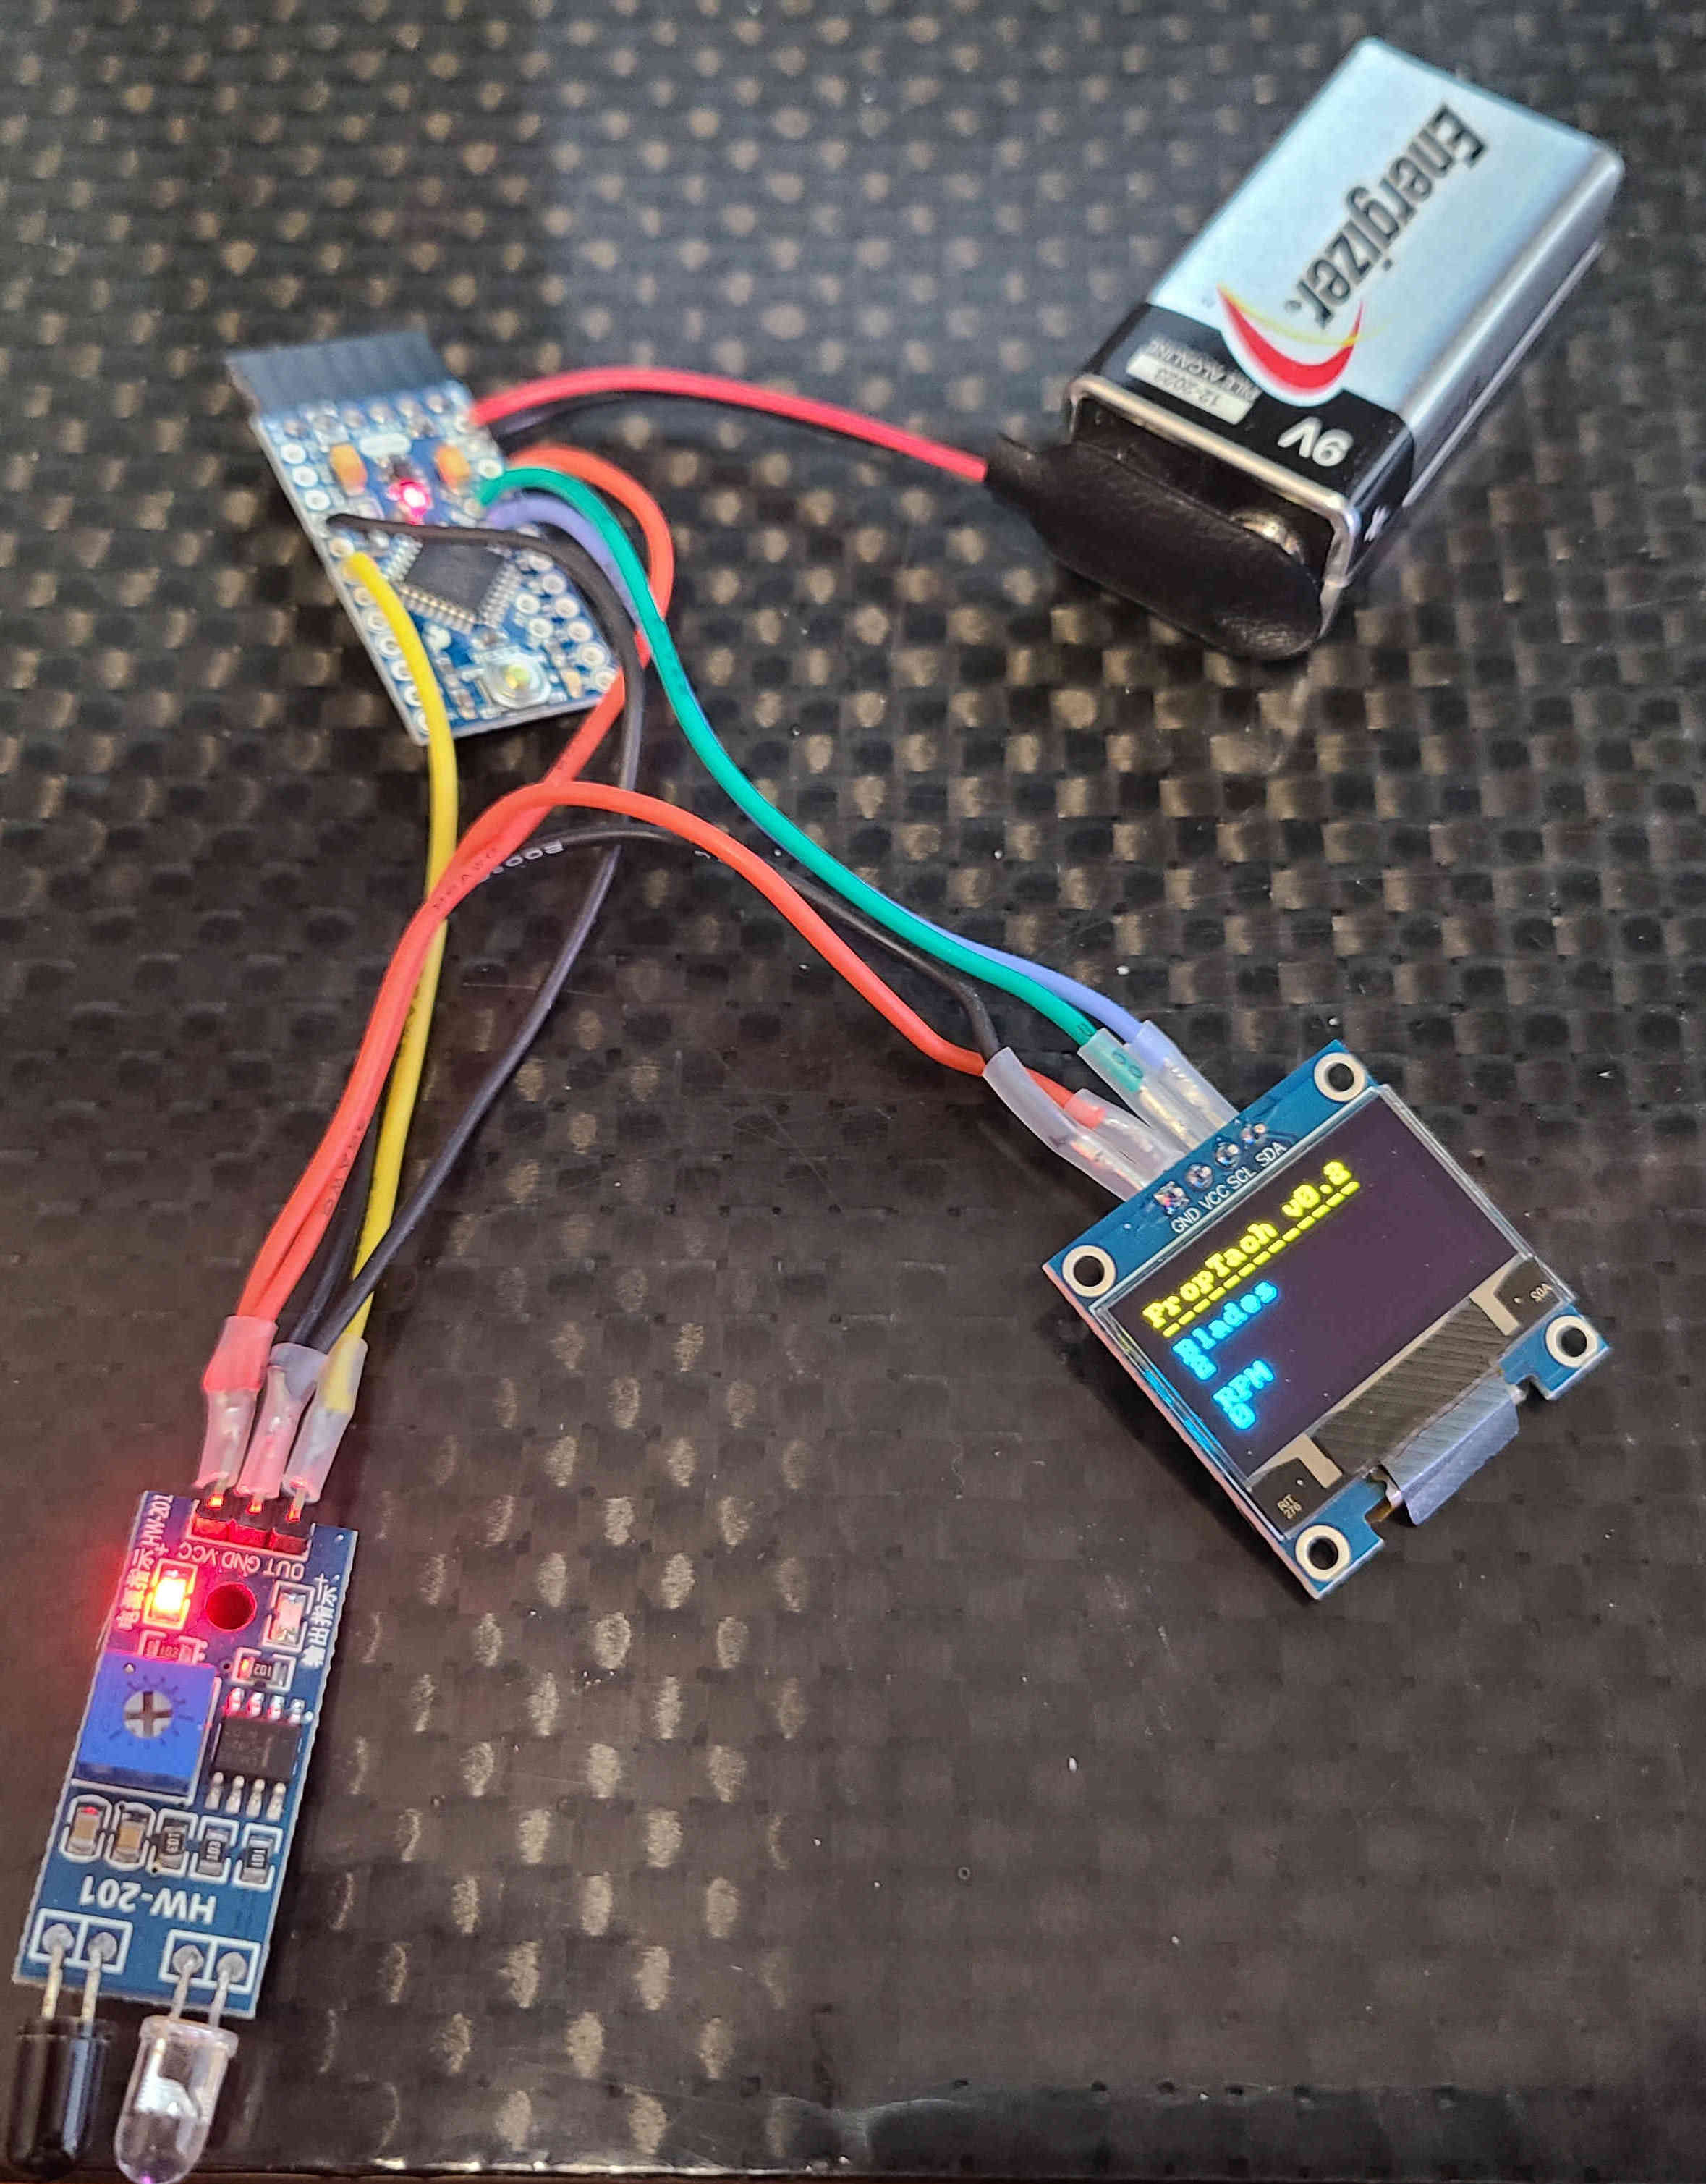
Finished!
Everything is soldered together and ready to test.
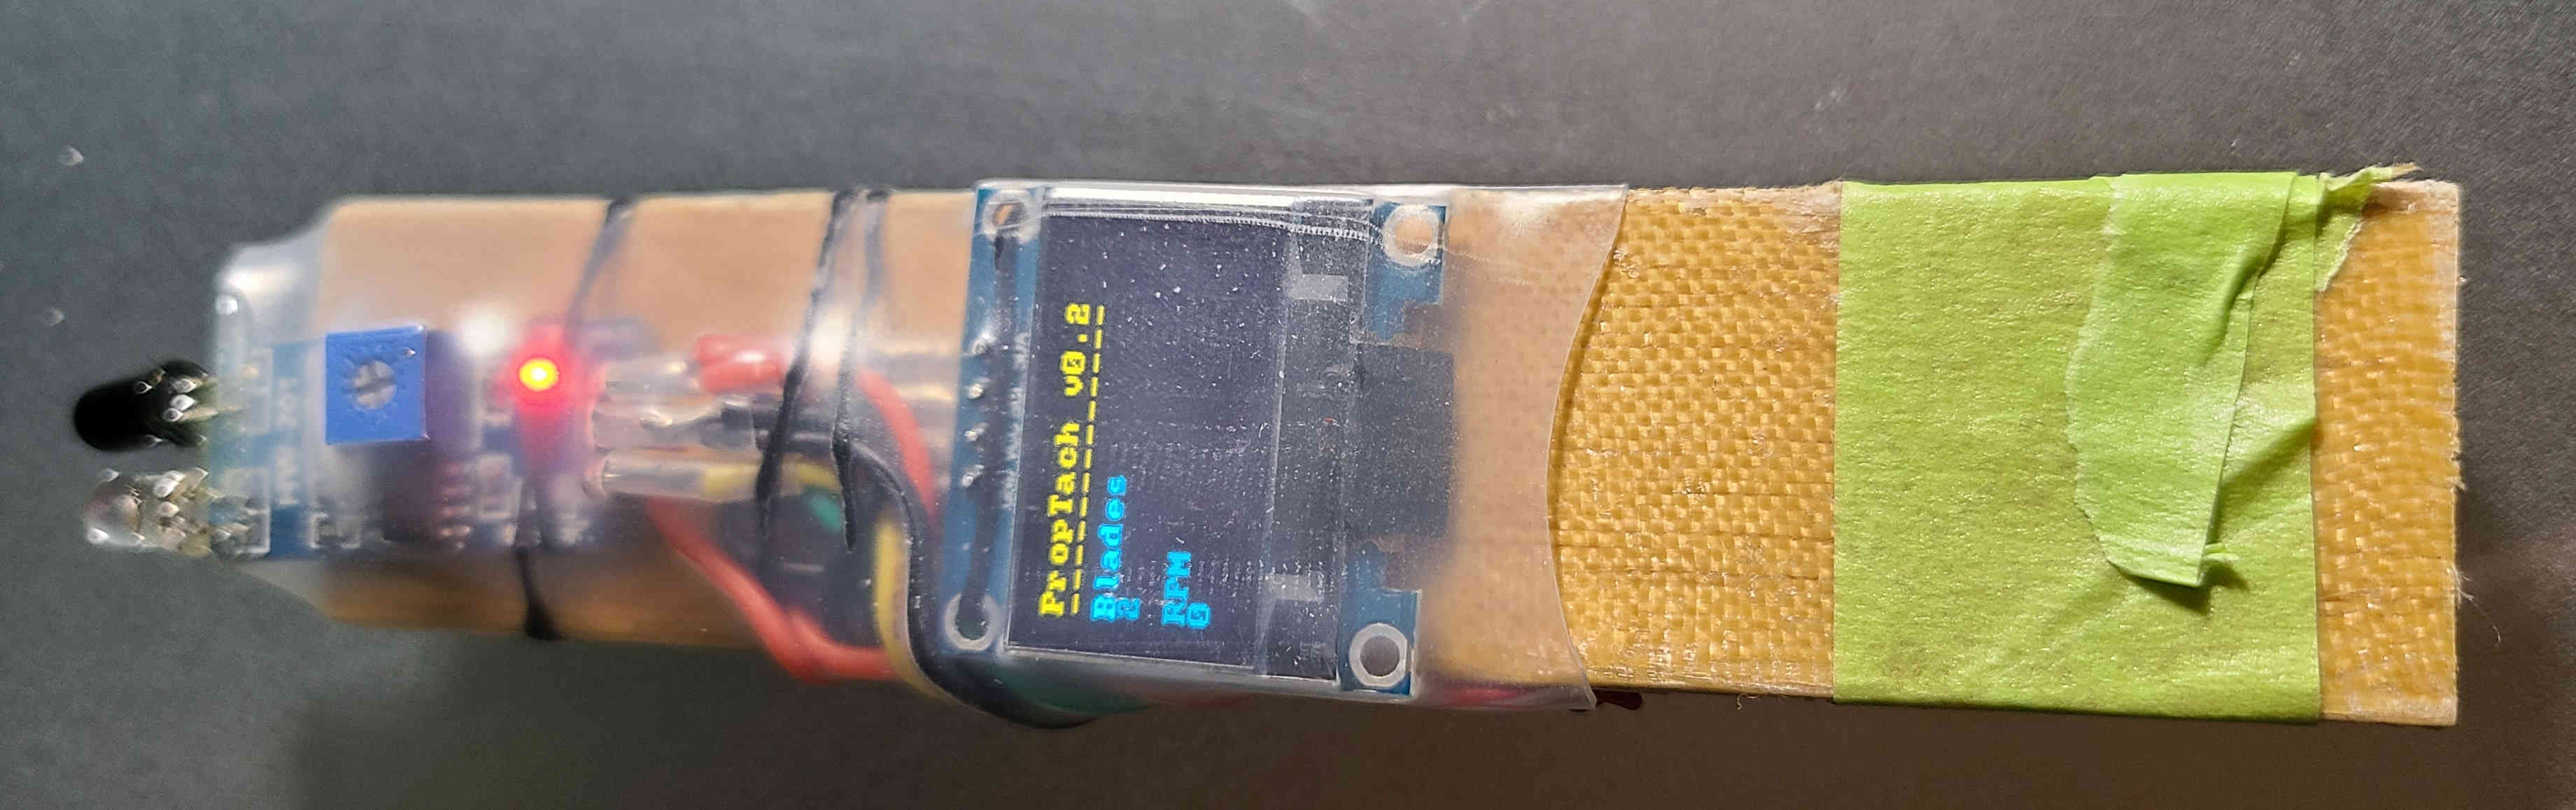
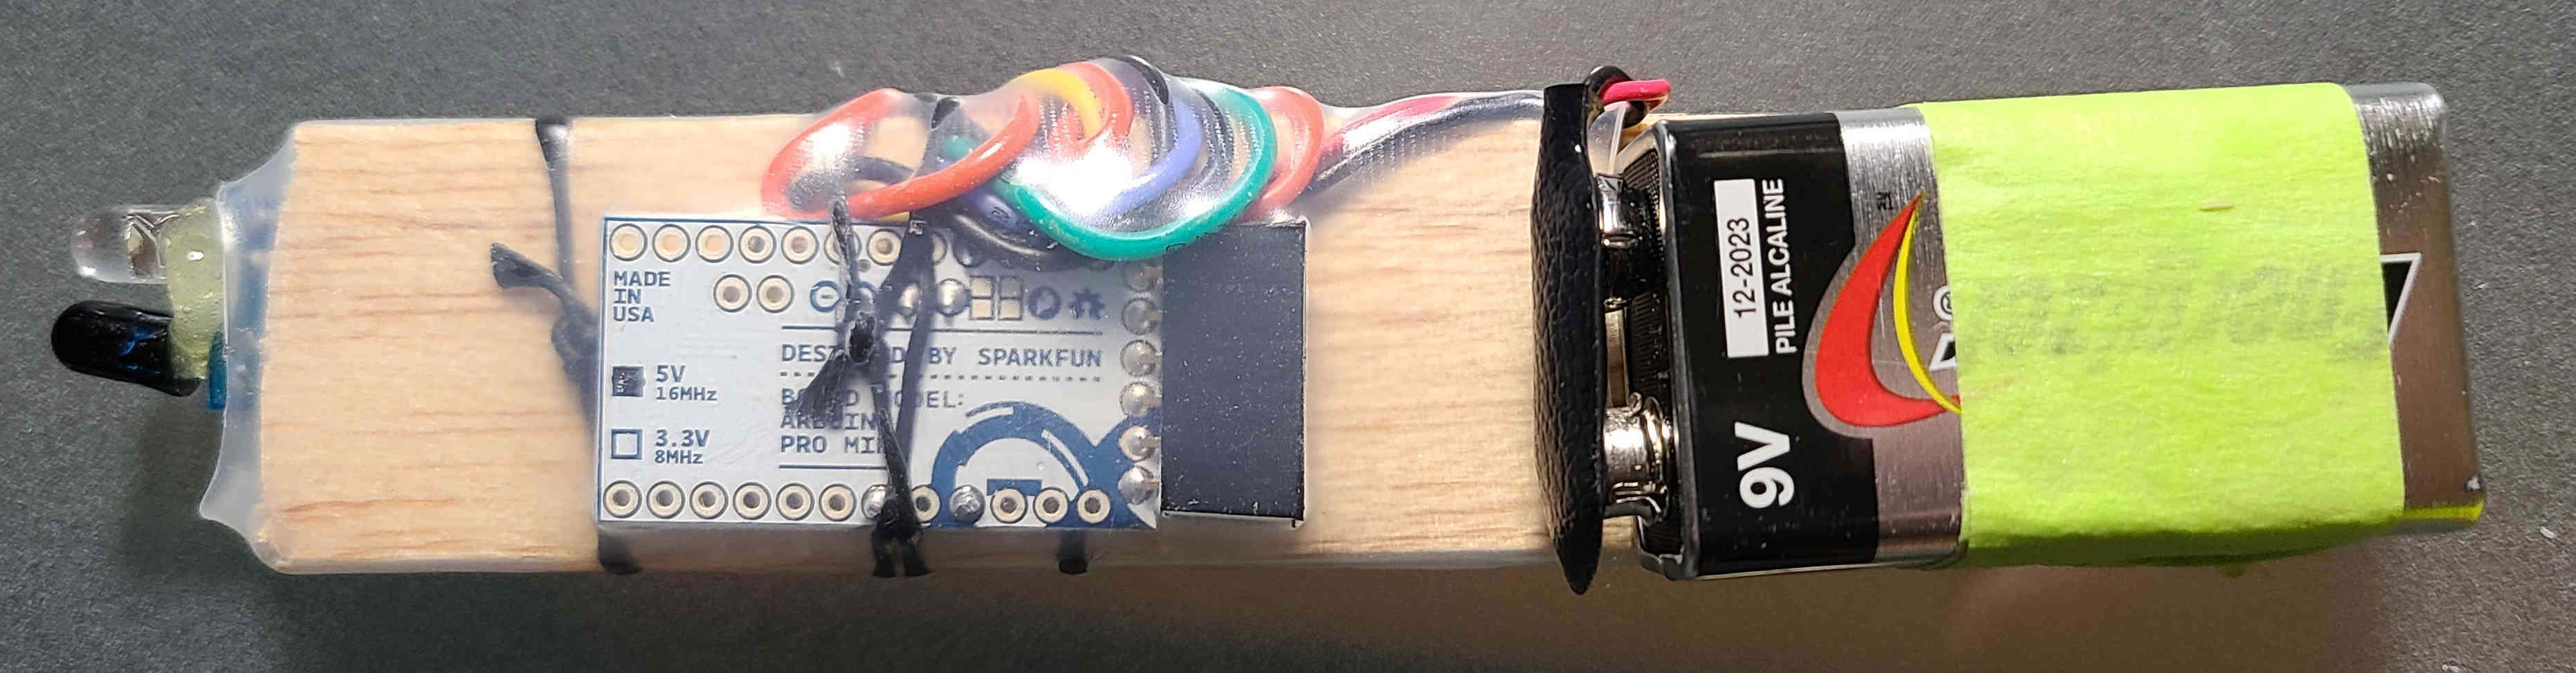
I mounted everything on a piece of balsa wood and added shrink wrap for durability. The battery is simply taped on for easy changing.
The code
Stay Curious!
Comments
Comments powered by Disqus